Product Flashing Operation Guide
Overview
This document details the operation steps for product flashing, helping users successfully complete the device firmware flashing process. The entire process takes approximately 5-10 minutes. Please ensure the operating environment meets the requirements and follow the steps strictly.
Preparations Before Starting
Required Items
- A computer running the Windows operating system (supports Windows 7/8/10/11)
- Original USB data cable
- Device to be flashed
- Flashing program corresponding to the device (
.exefile)
Notes
- Ensure the computer has sufficient battery power to avoid power failure during operation
- Use the original USB data cable to ensure connection stability
- Disable antivirus software and firewalls on the computer before flashing to prevent interference with program operation
- Do not disconnect the USB connection or close the flashing program during the flashing process
Flashing Steps
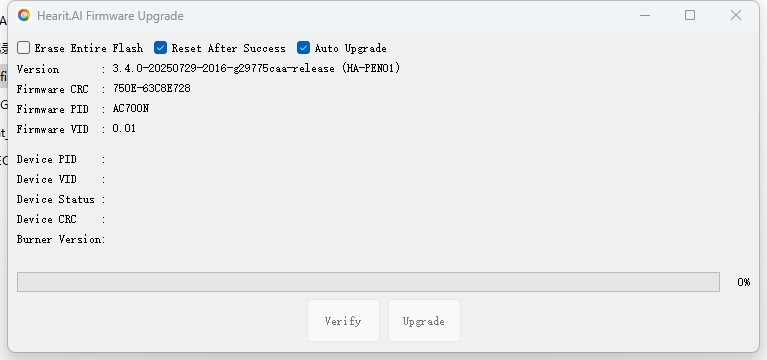
- Launch the Flashing Program
- Locate the flashing
.exefile corresponding to the device - Double-click the file to launch the flashing program
- Wait for the program to load completely (the main program interface usually appears)
- Locate the flashing
- Connect the Device to the Computer
- Use one end of the USB data cable to connect to a USB port on the computer
- Connect the other end to the USB port of the device
- Ensure the connection is secure; gently wiggle the interface to confirm stable connection
- Enable Device Flashing Mode
- Press and hold the device's power button to turn it on
- During the device startup process, follow the instructions in the device manual to enter "USB Update Mode" (flashing mode)
- After successfully entering the flashing mode, the device usually displays a specific icon or a change in indicator light status
- Automatic Flashing Process
- After the device enters the flashing mode, the flashing program will automatically detect the device
- The program interface will display the connection status and flashing progress
- Wait for the flashing to complete; do not perform any operations during this period
- Manually Trigger Flashing (If Automatic Flashing Does Not Start)
- If the program does not start flashing automatically, check whether the device has entered the flashing mode correctly
- Find and click the "Update Mode" or "Start Flashing" button in the flashing program interface
- Observe the progress bar displayed on the program interface and wait for the flashing to complete
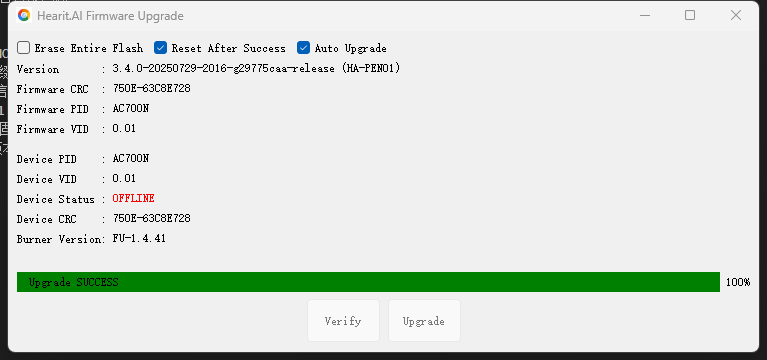
Completion and Verification
- After successful flashing, the program will display a prompt message such as "Flashing Completed" or "Success"
- The device will restart automatically or prompt that it can be disconnected
- Disconnect the USB connection and check if the device can start normally
- If the device starts normally, the flashing is successful
Frequently Asked Questions
- Program Fails to Detect the Device
- Check if the USB connection is normal
- Confirm that the device has entered the flashing mode correctly
- Try replacing the USB port or data cable
- Restart the computer and the device, then try again
- Flashing Fails During the Process
- Ensure the computer does not enter sleep mode
- Check if other programs are occupying the USB port
- Verify that the flashing file matches the device model
- Re-download the flashing program and try again